

我使用数据库的时间比我愿意承认的要长得多,而且很多时间都花在查看服务器的内部结构,试图准确地确定它们在做什么。感谢 MySQL Performance Schema 和 Information Schema 背后的工程师以及他们为提供可靠信息所做的努力。然后出现了 Sys schema,它提供了方便的服务器预封装预览。在这些 schema 出现之前,没有简单的方法来获取关于数据库实例的细粒度信息。
但是,查看一个时间点的信息的表格显示不允许进行趋势分析或快速浏览以确定服务器的状态。能够发现图表上的趋势或在达到阈值时发送警报至关重要。我在 PostgreSQL 和 MongoDB 世界的朋友们也遇到了同样的问题。好消息是,有一个针对所有这三个数据库的开源解决方案,它易于安装和使用。
我是一个在 Percona 工作时间不长的新员工,但接触 MySQL 已经有很长一段时间了。我的首要目标之一是学习如何设置和使用 Percona Monitoring and Measurement (PMM)。我认识很多乐于使用它的人,但我只在一次贸易展上短暂接触过它。早在开源数据库出现之前,我就对安装任何提供与数据库链接的图形信息的软件抱有天生的恐惧。这种犹豫源于尝试为专有数据库配置其他监控软件。
简而言之,PMM 易于安装和使用。文档写得很好,详细且方便。该软件本身很容易获得和安装。总体体验十分出色。
测试用例
我喜欢在旧笔记本电脑上尝试新东西,所以我安装了一个全新的 Ubuntu 20.04 LTS 副本。接下来,我阅读了 PMM 文档。
我应该说我读了两遍文档,同时嘟囔着不可能这么简单。在本文末尾,您将找到我输入的命令,用于安装 PMM 服务器和代理(MySQL、PostgreSQL 和 Mongo)。这是一个展示如何重现此测试用例的食谱。
以下是 Percona 数据库发行版
先决条件
安装 PMM 的先决条件是 Docker,这证明是整个安装过程中最耗时的部分。幸运的是,Ubuntu 的软件包管理软件 (apt) 使这变得非常简单。
安装 Percona Monitoring and Measurement 服务器
对于任何熟悉 APT 软件包管理器的人来说,安装 PMM 服务器都很简单。请注意提供用于连接到 PMM 服务器的 URL 的输出。在我的例子中,地址是 https://127.0.0.1:443/、https://192.168.1.209:443/ 和 https://172.17.0.1:443/。
您将必须登录到 PMM 仪表板(默认帐户和密码为 admin 和 admin)。
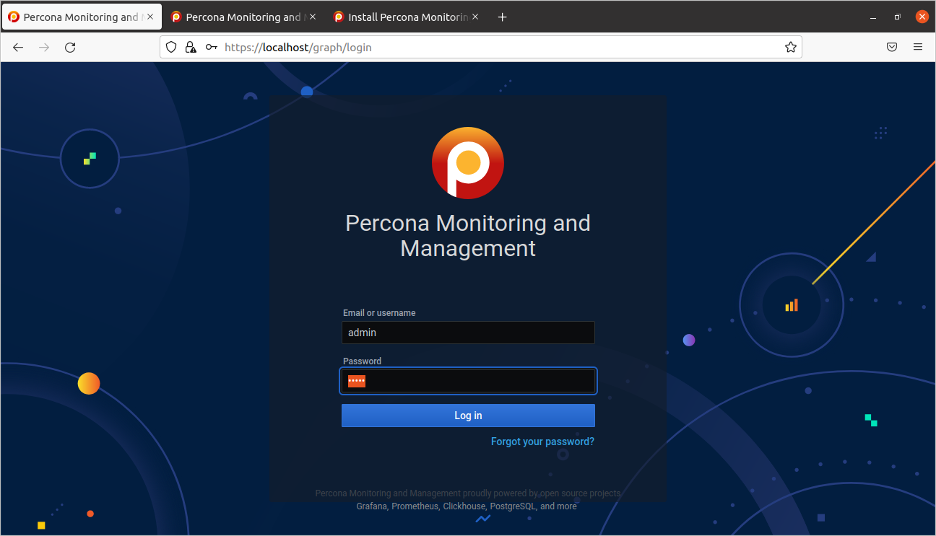
(David Stokes,CC BY-SA 4.0)
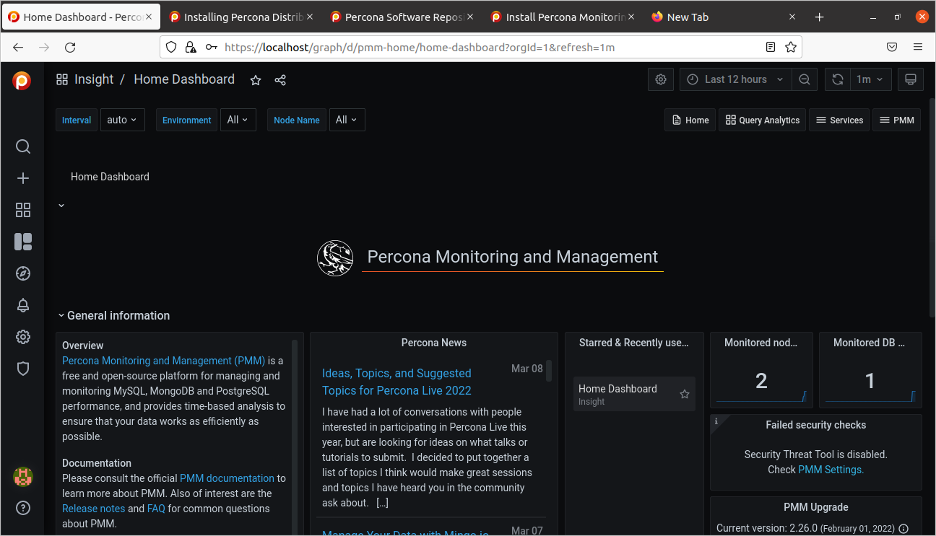
成功登录后,PMM 会显示一个仪表板。

(David Stokes,CC BY-SA 4.0)
此时,PMM 仅监控底层系统及其用于收集统计信息的数据库——这就是上图中的“监控节点”和“监控数据库”计数都显示 1 的原因。
数据库客户端
客户端监控数据库实例,同样,客户端也很容易使用软件包管理器安装。下一步是将客户端注册到服务器
$ sudo pmm-admin config --server-insecure-tls --server-url=https://admin:admin@127.0.0.1最后一步是配置数据库服务器。在下面的示例中,安装了 Percona 的 MySQL,并创建了一个帐户用于收集统计信息。最后,客户端从数据库实例收集信息
$ sudo pmm-admin add mysql --username=pmm --password=pass --query-source=perfschema对于 PostgreSQL 和 MongoDB,请在 add 选项上将数据库名称替换为您想要监控的相应实例。
(David Stokes,CC BY-SA 4.0)
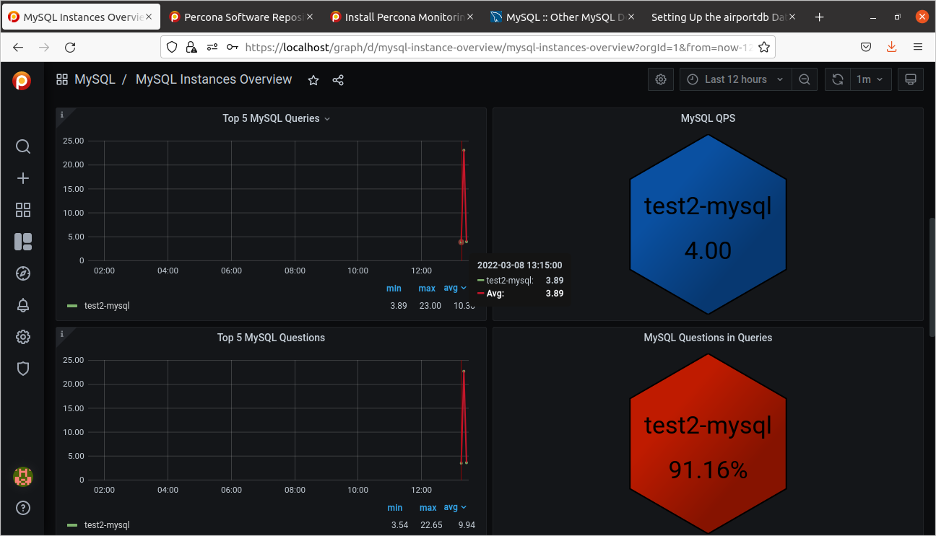
您会注意到上面的“监控节点”计数增加到 2。
PPM 让您可以访问服务器正在执行操作的许多不同视图。您可以看到服务器本身的整体健康状况。

(David Stokes,CC BY-SA 4.0)
通用 MySQL 仪表板显示系统的整体健康状况。
(David Stokes,CC BY-SA 4.0)
您可以轻松研究系统的负载。
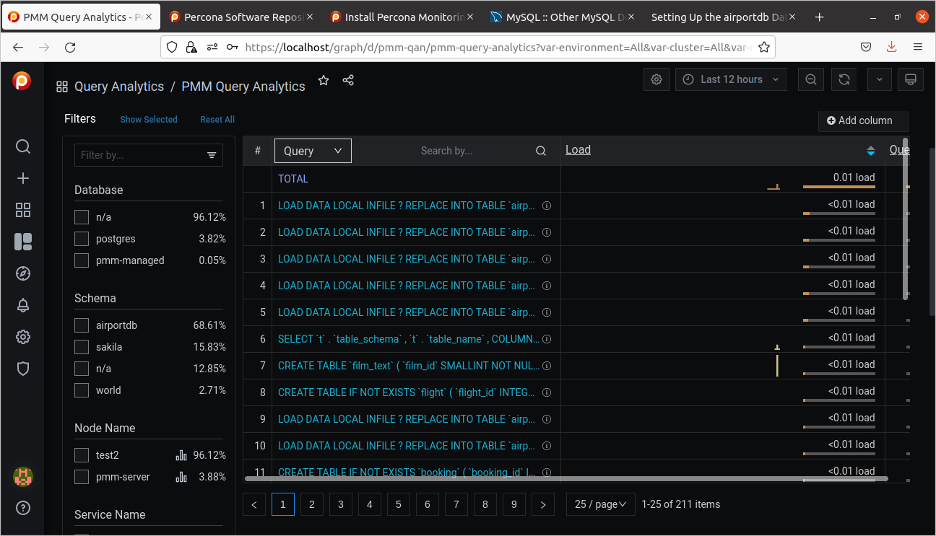
(David Stokes,CC BY-SA 4.0)
或研究单个查询。
总结
Percona Monitoring and Management 是一款开源工具,用于监控您的 MySQL、MongoDB 或 PostgreSQL 实例。它易于安装,并为您的服务器提供出色的洞察力。
请向作者提供您对此主题的任何反馈或问题。
食谱
以下是在全新安装的 Ubuntu 20.04 LTS 上安装 PMM 和 Percona MySQL 所需的命令和响应。
1. 安装 Docker
$ sudo update-manager

$ apt-get install ca-certificates curl gnupg lsudo sb-release

$ echo "deb [arch=$(dpkg --print-architecture) signed-by=/usr/share/keyrings/docker-archive-keyring.gpg] https://download.docker.com/linux/ubuntu \
  $(lsb_release -cs) stable" | sudo tee /etc/apt/sources.list.d/docker.list > /dev/null

$ sudo apt-get update
2. 安装 PMM 服务器
$ curl -fsSL https://www.percona.com/get/pmm | sudo /bin/bash

Gathering/downloading required components, this may take a moment

Checking docker installation - installed.

Starting PMM server...
Created PMM Data Volume: pmm-data
Created PMM Server: pmm-server
    Use the following command if you ever need to update your container by hand:
    docker run -d -p 443:443 --volumes-from pmm-data --name pmm-server --restart always percona/pmm-server:2

PMM Server has been successfully setup on this system!

You can access your new server using the one of following web addresses:
    https://127.0.0.1:443/
    https://192.168.1.209:443/
    https://172.17.0.1:443/

The default username is 'admin' and the password is 'admin' :)
Note: Some browsers may not trust the default SSL certificate when you first open one of the urls above.
If this is the case, Chrome users may want to type 'thisisunsafe' to bypass the warning.

Enjoy Percona Monitoring and Management!
3. 添加 Percona 仓库
$ wget https://repo.percona.com/apt/percona-release_latest.$(lsb_release -sc)_all.deb

$ sudo dpkg -i percona-release_latest.$(lsb_release -sc)_all.deb

$ sudo apt-get update

Get:1 http://repo.percona.com/percona/apt focal InRelease [15.8 kB]
Hit:2 http://us.archive.ubuntu.com/ubuntu focal InRelease
Hit:3 http://us.archive.ubuntu.com/ubuntu focal-updates InRelease
Hit:4 http://us.archive.ubuntu.com/ubuntu focal-backports InRelease
Hit:5 http://security.ubuntu.com/ubuntu focal-security InRelease
Get:6 http://repo.percona.com/prel/apt focal InRelease [9,779 B]
Hit:7 https://download.docker.com/linux/ubuntu focal InRelease
Get:8 http://repo.percona.com/percona/apt focal/main Sources [4,509 B]
Get:9 http://repo.percona.com/percona/apt focal/main amd64 Packages [18.1 kB]
Get:10 http://repo.percona.com/percona/apt focal/main i386 Packages [414 B]
Get:11 http://repo.percona.com/prel/apt focal/main i386 Packages [750 B]
Get:12 http://repo.percona.com/prel/apt focal/main amd64 Packages [851 B]
Fetched 50.2 kB in 2s (22.7 kB/s)
Reading package lists... Done
4. 安装代理
$ sudo apt-get install pmm2-client

Reading package lists... Done
Building dependency tree
Reading state information... Done
The following NEW packages will be installed:
  pmm2-client
0 upgraded, 1 newly installed, 0 to remove and 1 not upgraded.
Need to get 78.0 MB of archives.
After this operation, 195 MB of additional disk space will be used.
Get:1 http://repo.percona.com/percona/apt focal/main amd64 pmm2-client amd64 2.26.0-6.focal [78.0 MB]
Fetched 78.0 MB in 9s (9,078 kB/s)
Selecting previously unselected package pmm2-client.
(Reading database ... 144323 files and directories currently installed.)
Preparing to unpack .../pmm2-client_2.26.0-6.focal_amd64.deb ...
Adding system user `pmm-agent' (UID 127) ...
Adding new group `pmm-agent' (GID 134) ...
Adding new user `pmm-agent' (UID 127) with group `pmm-agent' ...
Creating home directory `/usr/local/percona' ...
Unpacking pmm2-client (2.26.0-6.focal) ...
Setting up pmm2-client (2.26.0-6.focal) ...
Created symlink /etc/systemd/system/multi-user.target.wants/pmm-agent.service → /lib/systemd/system/pmm-agent.service.

$ sudo pmm-admin config --server-insecure-tls --server-url=https://admin:admin@127.0.0.1:443

Checking local pmm-agent status...
pmm-agent is running.
Registering pmm-agent on PMM Server...
Registered.
Configuration file /usr/local/percona/pmm2/config/pmm-agent.yaml updated.
Reloading pmm-agent configuration...
Configuration reloaded.
Checking local pmm-agent status...
pmm-agent is running.
5. 安装 Percona MySQL
$ wget https://repo.percona.com/apt/percona-release_latest.generic_all.deb
--2022-03-08 12:57:38-- https://repo.percona.com/apt/percona-release_latest.generic_all.deb
Resolving repo.percona.com (repo.percona.com)... 149.56.23.204
Connecting to repo.percona.com (repo.percona.com)|149.56.23.204|:443... connected.
HTTP request sent, awaiting response... 200 OK
Length: 11804 (12K) [application/x-debian-package]
Saving to: ‘percona-release_latest.generic_all.deb’

percona-release_latest.generic_ 100%[======================================================>] 11.53K --.-KB/s in 0s

2022-03-08 12:57:38 (96.1 MB/s) - ‘percona-release_latest.generic_all.deb’ saved [11804/11804]


$ sudo dpkg -i percona-release_latest.generic_all.deb
(Reading database ... 144372 files and directories currently installed.)
Preparing to unpack percona-release_latest.generic_all.deb ...
Unpacking percona-release (1.0-27.generic) over (1.0-27.generic) ...
Setting up percona-release (1.0-27.generic) ...
* Enabling the Percona Original repository
<*> All done!
==> Please run "apt-get update" to apply changes
* Enabling the Percona Release repository
<*> All done!
==> Please run "apt-get update" to apply changes
The percona-release package now contains a percona-release script that can enable additional repositories for our newer products.

For example, to enable the Percona Server 8.0 repository use:

  percona-release setup ps80

Note: To avoid conflicts with older product versions, the percona-release setup command may disable our original repository for some products.

For more information, please visit:
  https://www.percona.com/doc/percona-repo-config/percona-release.html


$ sudo percona-release setup pdps-8.0
* Disabling all Percona Repositories
* Enabling the Percona Distribution for MySQL 8.0 - PS repository
Hit:1 http://security.ubuntu.com/ubuntu focal-security InRelease
Get:2 http://repo.percona.com/pdps-8.0/apt focal InRelease [9,806 B]
Hit:3 http://us.archive.ubuntu.com/ubuntu focal InRelease
Hit:4 http://repo.percona.com/prel/apt focal InRelease
Hit:5 http://us.archive.ubuntu.com/ubuntu focal-updates InRelease
Hit:6 https://download.docker.com/linux/ubuntu focal InRelease
Hit:7 http://us.archive.ubuntu.com/ubuntu focal-backports InRelease
Get:8 http://repo.percona.com/pdps-8.0/apt focal/main Sources [6,609 B]
Get:9 http://repo.percona.com/pdps-8.0/apt focal/main amd64 Packages [67.4 kB]
Fetched 83.8 kB in 1s (63.1 kB/s)
Reading package lists... Done


$ sudo apt install percona-server-server

mysql -e "CREATE FUNCTION fnv1a_64 RETURNS INTEGER SONAME 'libfnv1a_udf.so'"
    mysql -e "CREATE FUNCTION fnv_64 RETURNS INTEGER SONAME 'libfnv_udf.so'"
    mysql -e "CREATE FUNCTION murmur_hash RETURNS INTEGER SONAME 'libmurmur_udf.so'"


$ sudo apt install percona-mysl-shell

mysqlsh root@localhost
SQL MODE
CREATE USER 'pmm'@'localhost' IDENTIFIED BY 'pass' WITH MAX_USER_CONNECTIONS 10;
GRANT SELECT, PROCESS, SUPER, REPLICATION CLIENT, RELOAD, BACKUP_ADMIN ON *.* TO 'pmm'@'localhost';
6. 启动客户端
$ sudo pmm-admin add mysql --username=pmm --password=pass --query-source=perfschema

MySQL Service added.
Service ID : /service_id/d774faf2-fd3c-4758-9db9-3e1edb65b292
Service name: test2-mysql

Table statistics collection enabled (the limit is 1000, the actual table count is 341).


评论已关闭。