

Vely 结合了 C 语言的高性能和低占用空间,以及像 PHP 这样易于使用和安全性更高的语言的优点。 它是免费和开源软件,根据 GPLv3 和 LGPL 3 许可(用于库),因此您甚至可以用它构建商业软件。
将 Vely 用于 SaaS
您可以使用 Vely 创建一个多租户 Web 应用程序,您可以在 Internet 上以软件即服务 (SaaS) 的形式运行它。 每个用户都拥有与其他用户完全隔离的数据空间。
在这个示例 Web 应用程序中,用户可以注册笔记本服务以创建笔记,然后查看和删除它们。 它在七个源文件的 310 行代码中演示了多种技术集成。 这些技术包括
- MariaDB
- Web 浏览器
- Apache
- Unix 套接字
工作原理
以下是从用户角度来看应用程序的工作原理。 代码演练在图像之后。
该应用程序允许用户通过指定电子邮件地址和密码来创建新登录名。 您可以随意设置这些样式,例如使用 CSS

(Sergio Mijatovic, CC BY-SA 4.0)
验证用户电子邮件

(Sergio Mijatovic, CC BY-SA 4.0)
每个用户都使用其唯一的用户名和密码登录

(Sergio Mijatovic, CC BY-SA 4.0)
登录后,用户可以添加笔记
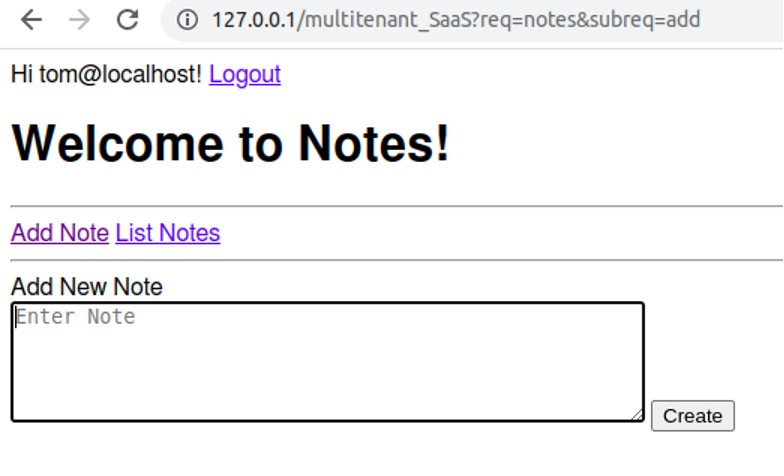
(Sergio Mijatovic, CC BY-SA 4.0)
用户可以获取笔记列表
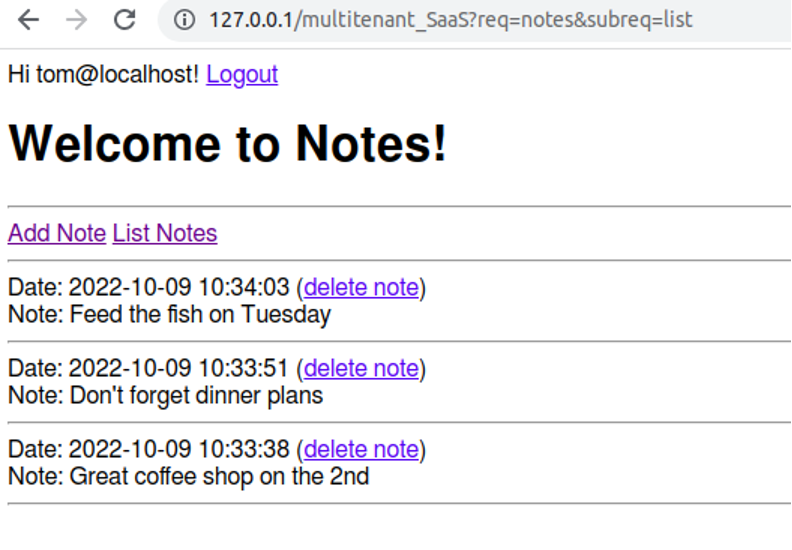
(Sergio Mijatovic, CC BY-SA 4.0)
应用程序在删除笔记之前会要求确认
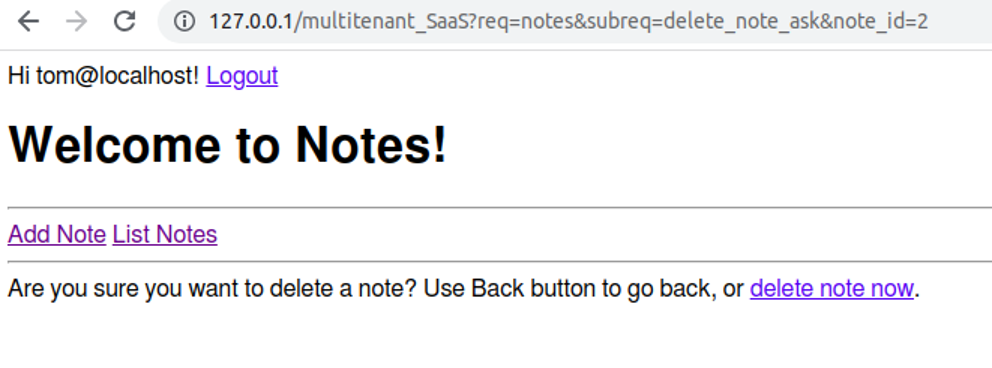
(Sergio Mijatovic, CC BY-SA 4.0)
用户确认后,笔记将被删除
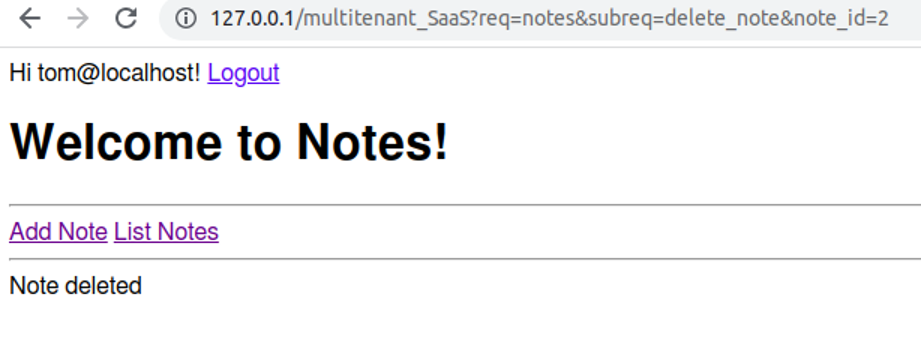
(Sergio Mijatovic, CC BY-SA 4.0)
设置先决条件
按照 Vely.dev 上的安装说明进行操作。 这是一个快速的过程,它使用标准的打包工具,例如 DNF、APT、Pacman 或 Zypper。
因为它们是此示例的一部分,所以您必须安装 Apache 作为 Web 服务器,MariaDB 作为数据库。
安装 Vely 后,如果您正在使用 Vim,请打开语法高亮显示
vv -m获取源代码
此演示 SaaS 应用程序的源代码是 Vely 安装的一部分。 为每个应用程序创建一个单独的源代码目录是一个好主意(您可以随意命名)。 在这种情况下,解压源代码会为您执行此操作
$ tar xvf $(vv -o)/examples/multitenant_SaaS.tar.gz
$ cd multitenant_SaaS
默认情况下,应用程序名为 multitenant_SaaS,但您可以将其命名为任何名称(如果您这样做,请在所有地方更改它)。
设置应用程序
第一步是创建一个应用程序。 使用 Vely 的 vf 实用程序可以轻松完成此操作
$ sudo vf -i -u $(whoami) multitenant_SaaS此命令创建一个新的应用程序主目录 (/var/lib/vv/multitenant_SaaS) 并为您执行应用程序设置。 主要意味着在主文件夹中创建各种子目录并分配权限。 在这种情况下,只有当前用户(whoami 的结果)拥有这些目录,权限为 0700,这确保了其他人无法访问这些文件。
设置数据库
在进行任何编码之前,您需要一个地方来存储应用程序使用的信息。 首先,创建一个名为 db_multitenant_SaaS 的 MariaDB 数据库,由用户 vely 拥有,密码为 your_password。 您可以更改任何这些值,但请记住在本示例中在所有地方都更改它们。
以 root 身份登录 MySQL 实用程序
create database if not exists db_multitenant_SaaS;
create user if not exists vely identified by 'your_password';
grant create,alter,drop,select,insert,delete,update on db_multitenant_SaaS.* to vely;
然后在数据库中创建数据库对象(表和记录等)
use db_multitenant_SaaS;
source setup.sql;
exit
将 Vely 连接到数据库
为了让 Vely 知道您的数据库在哪里以及如何登录,请创建一个名为 db_multitenant_SaaS 的数据库配置文件。 (这是源代码中数据库语句使用的名称,因此如果您更改它,请确保在所有地方都更改它。)
Vely 使用原生的 MariaDB 数据库连接,因此您可以指定给定数据库允许您的任何选项
$ echo '[client]
user=vely
password=your_password
database=db_multitenant_SaaS
protocol=TCP
host=127.0.0.1
port=3306' > db_multitenant_SaaS
构建应用程序
使用 vv 实用程序来构建应用程序,使用 --db 选项来指定 MariaDB 数据库和数据库配置文件
$ vv -q --db=mariadb:db_multitenant_SaaS启动应用程序服务器
要启动 Web 应用程序的应用程序服务器,请使用 vf FastCGI 进程管理器。 应用程序服务器使用 Unix 套接字与 Web 服务器通信(创建反向代理)
$ vf -w 3 multitenant_SaaS这将启动三个守护程序进程来处理传入的请求。 您还可以启动一个自适应服务器,该服务器会增加进程数量以处理更多请求,并在不需要进程时逐渐减少进程数量
$ vf multitenant_SaaS请参阅 vf 以获取更多选项,以帮助您获得最佳性能。
当您需要停止应用程序服务器时,请使用 -m quit 选项
$ vf -m quit multitenant_SaaS设置 Web 服务器
这是一个 Web 应用程序,因此该应用程序需要一个 Web 服务器。 此示例通过 Unix 套接字侦听器使用 Apache。
1. 设置 Apache
要将 Apache 配置为反向代理并将您的应用程序连接到它,您需要启用 FastCGI 代理支持,这通常意味着使用 proxy 和 proxy_fcgi 模块。
对于 Fedora 系统(或其他系统,如 Arch),通过在 /etc/httpd/conf/httpd.conf Apache 配置文件中添加(或取消注释)适当的 LoadModule 指令来启用 proxy 和 proxy_fcgi 模块。
对于 Debian、Ubuntu 和类似系统,启用 proxy 和 proxy_fcgi 模块
$ sudo a2enmod proxy
$ sudo a2enmod proxy_fcgi
对于 OpenSUSE,将这些行添加到 /etc/apache2/httpd.conf 的末尾
LoadModule proxy_module modules/mod_proxy.so
LoadModule proxy_fcgi_module modules/mod_proxy_fcgi.so
2. 配置 Apache
现在您必须将代理信息添加到 Apache 配置文件中
ProxyPass "/multitenant_SaaS" unix:///var/lib/vv/multitenant_SaaS/sock/sock|fcgi:///multitenant_SaaS您的配置位置可能因您的 Linux 发行版而异
- Fedora、CentOS、Mageia 和 Arch:
/etc/httpd/conf/httpd.conf - Debian、Ubuntu、Mint:
/etc/apache2/apache2.conf - OpenSUSE:
/etc/apache2/httpd.conf
3. 重启
最后,重启 Apache。 在 Fedora 和类似系统以及 Arch Linux 上
$ sudo systemctl restart httpd在 Debian 和基于 Debian 的系统以及 OpenSUSE 上
$ sudo systemctl restart apache2设置本地邮件
此示例使用电子邮件作为其功能的一部分。 如果您的服务器已经可以发送电子邮件,则可以跳过此步骤。 否则,您可以使用本地邮件 (myuser@localhost) 进行测试。 为此,请安装 Sendmail。
在 Fedora 和类似系统上
$ sudo dnf install sendmail
$ sudo systemctl start sendmail
在 Debian 系统上(如 Ubuntu)
$ sudo apt install sendmail
$ sudo systemctl start sendmail
当应用程序向本地用户发送电子邮件时,例如 OS_user@localhost,那么您可以通过查看 /var/mail/(“邮件池”)来验证电子邮件是否已发送。
从浏览器访问应用程序服务器
假设您正在本地运行该应用程序,请使用 http://127.0.0.1/multitenant_SaaS?req=notes&action=begin 从 Web 浏览器访问您的应用程序服务器。 如果您在 Internet 上的实时服务器上运行此程序,则可能需要调整防火墙设置以允许 HTTP 流量。
源代码
此示例应用程序包含七个源文件。 您可以自己查看代码(请记住,这些文件中只有 310 行代码),但这里是每个文件的概述。
SQL 设置 (setup.sql)
创建的两个表是
- users:有关每个用户的信息。 users 表中的每个用户都有其唯一的 ID(userId 列)以及其他信息,例如电子邮件地址以及是否已验证。 还有一个哈希密码。 实际密码永远不会以纯文本(或其他方式)存储; 使用单向哈希来检查密码。
- notes:用户输入的笔记。 notes 表包含笔记,每个笔记都带有 userId 列,用于说明哪个用户拥有它们。 userId 列的值与 users 表中同名的列匹配。 这样,每条笔记都清楚地属于单个用户。
文件内容
create table if not exists notes (dateOf datetime, noteId bigint auto_increment primary key, userId bigint, note varchar(1000));
create table if not exists users (userId bigint auto_increment primary key, email varchar(100), hashed_pwd varchar(100), verified smallint, verify_token varchar(30), session varchar(100));
create unique index if not exists users1 on users (email);
运行时数据 (login.h)
为了正确显示“登录”、“注册”和“注销”链接,您需要一些在应用程序中任何位置都可用的标志。 此外,应用程序使用 Cookie 来维护会话,因此这需要在任何地方都可用,例如,验证会话是否有效。 发送到应用程序的每个请求都以这种方式确认。 仅允许带有可验证 Cookie 的请求。
因此,为此,您有一个 global_request_data 类型 reqdata(请求数据),其中包含 sess_userId(用户 ID)和 sess_id(用户当前会话 ID)。 您还有一些不言自明的标志,可以帮助呈现页面
#ifndef _VV_LOGIN
#define _VV_LOGIN

typedef struct s_reqdata {
    bool displayed_logout; // true if Logout link displayed
    bool is_logged_in; // true if session verified logged-in
    char *sess_userId; // user ID of current session
    char *sess_id; // session ID
} reqdata;

void login_or_signup ();

#endif
会话检查和会话数据 (_before.vely)
Vely 具有 before_request_handler 的概念。 您编写的代码在处理请求的任何其他代码之前执行。 为此,您只需将此代码写入名为 _before.vely 的文件中,其余的将自动处理。
SaaS 应用程序执行的任何操作,例如处理发送到应用程序的请求,都必须经过安全验证。 这样,应用程序就知道调用者是否具有执行操作所需的权限。
权限检查是在请求前处理程序中完成的。 这样,无论您有什么其他代码处理请求,您都已经拥有会话信息。
为了使会话数据(如会话 ID 和用户 ID)在代码中的任何位置都可用,您可以使用 global_request_data。 它只是一个指向内存的通用指针 (void*),任何处理请求的代码都可以访问它。 这非常适合处理会话,如下所示
#include "vely.h"
#include "login.h"

// _before() is a before-request-handler. It always executes before
// any other code that handles a request. It's a good place for any
// kind of request-wide setting or data initialization
void _before() {
    // Output HTTP header
    out-header default
    reqdata *rd; // this is global request data, see login.h
    // allocate memory for global request data, will be automatically deallocated
    // at the end of request
    new-mem rd size sizeof(reqdata)
    // initialize flags
    rd->displayed_logout = false;
    rd->is_logged_in = false;
    // set the data we created to be global request data, accessible
    // from any code that handles a request
    set-req data rd
    // check if session exists (based on cookies from the client)
    // this executes before any other request-handling code, making it
    // easier to just have session information ready
    _check_session ();
}
检查会话是否有效 (_check_session.vely)
多租户 SaaS 应用程序中最重要的任务之一是检查(尽快)会话是否有效,方法是检查用户是否已登录。 这是通过从客户端(例如 Web 浏览器)获取会话 ID 和用户 ID Cookie,并将其与存储会话的数据库进行比较来完成的
#include "vely.h"
#include "login.h"


// Check if session is valid
void _check_session () {
    // Get global request data
    reqdata *rd;
    get-req data to rd
    // Get cookies from user browser
    get-cookie rd->sess_userId="sess_userId"
    get-cookie rd->sess_id="sess_id"
    if (rd->sess_id[0] != 0) {
        // Check if session ID is correct for given user ID
        char *email;
        run-query @db_multitenant_SaaS = "select email from users where userId='%s' and session='%s'" output email : rd->sess_userId, rd->sess_id row-count define rcount
            query-result email to email
        end-query
        if (rcount == 1) {
            // if correct, set logged-in flag
            rd->is_logged_in = true;
            // if Logout link not display, then display it
            if (rd->displayed_logout == false) {
                @Hi <<p-out email>>! <a href="https://open-source.net.cn/?req=login&action=logout">Logout</a><br/>
                rd->displayed_logout = true;
            }
        } else rd->is_logged_in = false;
    }
}
注册、登录、注销 (login.vely)
任何多租户系统的基础是用户注册、登录和注销的能力。 通常,注册涉及验证电子邮件地址; 通常,同一个电子邮件地址用作用户名。 这里就是这种情况。
此处实现了几个子请求,这些子请求是执行该功能所必需的
- 当注册新用户时,显示 HTML 表单以收集信息。 此 URL 请求签名是
req=login&action=newuser。 - 作为对注册表单的响应,创建一个新用户。 URL 请求签名是
req=login&action=createuser。 input-param 信号获取 email 和 pwd POST 表单字段。 密码值是单向哈希,电子邮件验证令牌被创建为随机五位数字。 这些插入到 users 表中,创建一个新用户。 发送验证电子邮件,并提示用户阅读电子邮件并输入代码。 - 通过输入发送到该电子邮件的验证码来验证电子邮件。 URL 请求签名是
req=login&action=verify。 - 显示一个登录表单供用户登录。 URL 请求签名是
req=login(例如,action为空)。 - 通过验证电子邮件地址(用户名)和密码登录。 URL 请求签名是
req=login&action=login。 - 根据用户请求注销。 URL 请求签名是
req=login&action=logout。 - 应用程序的着陆页。 URL 请求签名是
req=login&action=begin。 - 如果用户当前已登录,请转到应用程序的着陆页。
请参阅下面的示例
#include "vely.h"
#include "login.h"

// Handle session maintenance, login, logout, session verification
// for any multitenant Cloud application
void login () {
    // Get URL input parameter "action"
    input-param action

    // Get global request data, we record session information in it, so it's handy
    reqdata *rd;
    get-req data to rd

    // If session is already established, the only reason why we won't proceed to
    // application home is if we're logging out
    if (rd->is_logged_in) {
        if (strcmp(action, "logout")) {
            _show_home();
            exit-request
        }
    }

    // Application screen to get started. Show links to login or signup and show
    // home screen appropriate for this
    if (!strcmp (action, "begin")) {
        _show_home();
        exit-request

    // Start creating new user. Ask for email and password, then proceed to create user
    // when this form is submitted.
    } else if (!strcmp (action, "newuser")) {
        @Create New User<hr/>
        @<form action="https://open-source.net.cn/?req=login" method="POST">
        @<input name="action" type="hidden" value="createuser">
        @<input name="email" type="text" value="" size="50" maxlength="50" required autofocus placeholder="Email">
        @<input name="pwd" type="password" value="" size="50" maxlength="50" required placeholder="Password">
        @<input type="submit" value="Sign Up">
        @</form>

    // Verify code sent to email by user. The code must match, thus verifying email address
    } else if (!strcmp (action, "verify")) {
        input-param code
        input-param email
        // Get verify token based on email
        run-query @db_multitenant_SaaS = "select verify_token from users where email='%s'" output db_verify : email
            query-result db_verify to define db_verify
            // Compare token recorded in database with what user provided
            if (!strcmp (code, db_verify)) {
                @Your email has been verifed. Please <a href="https://open-source.net.cn/?req=login">Login</a>.
                // If matches, update user info to indicate it's verified
                run-query @db_multitenant_SaaS no-loop = "update users set verified=1 where email='%s'" : email
                exit-request
            }
        end-query
        @Could not verify the code. Please try <a href="https://open-source.net.cn/?req=login">again</a>.
        exit-request

    // Create user - this runs when user submits form with email and password to create a user
    } else if (!strcmp (action, "createuser")) {
        input-param email
        input-param pwd
        // create hashed (one-way) password
        hash-string pwd to define hashed_pwd
        // generate random 5 digit string for verify code
        random-string to define verify length 5 number
        // create user: insert email, hashed password, verification token. Current verify status is 0, or not verified
        begin-transaction @db_multitenant_SaaS
        run-query @db_multitenant_SaaS no-loop = "insert into users (email, hashed_pwd, verified, verify_token, session) values ('%s', '%s', '0', '%s', '')" : email, hashed_pwd, verify affected-rows define arows error define err on-error-continue
        if (strcmp (err, "0") || arows != 1) {
            // if cannot add user, it probably doesn't exist. Either way, we can't proceed.
            login_or_signup();
            @User with this email already exists.
            rollback-transaction @db_multitenant_SaaS
        } else {
            // Create email with verification code and email it to user
            write-string define msg
                @From: vely@vely.dev
                @To: <<p-out email>>
                @Subject: verify your account
                @
                @Your verification code is: <<p-out verify>>
            end-write-string
            exec-program "/usr/sbin/sendmail" args "-i", "-t" input msg status define st
            if (st != 0) {
                @Could not send email to <<p-out email>>, code is <<p-out verify>>
                rollback-transaction @db_multitenant_SaaS
                exit-request
            }
            commit-transaction @db_multitenant_SaaS
            // Inform the user to go check email and enter verification code
            @Please check your email and enter verification code here:
            @<form action="https://open-source.net.cn/?req=login" method="POST">
            @<input name="action" type="hidden" value="verify" size="50" maxlength="50">
            @<input name="email" type="hidden" value="<<p-out email>>">
            @<input name="code" type="text" value="" size="50" maxlength="50" required autofocus placeholder="Verification code">
            @<button type="submit">Verify</button>
            @</form>
        }

    // This runs when logged-in user logs out.
    } else if (!strcmp (action, "logout")) {
        // Update user table to wipe out session, meaning no such user is logged in
        if (rd->is_logged_in) {
            run-query @db_multitenant_SaaS = "update users set session='' where userId='%s'" : rd->sess_userId no-loop affected-rows define arows
            if (arows == 1) {
                rd->is_logged_in = false; // indicate user not logged in
                @You have been logged out.<hr/>
            }
        }
        _show_home();

    // Login: this runs when user enters user name and password
    } else if (!strcmp (action, "login")) {
        input-param pwd
        input-param email
        // create one-way hash with the intention of comparing with user table - password is NEVER recorded
        hash-string pwd to define hashed_pwd
        // create random 30-long string for session ID
        random-string to rd->sess_id length 30
        // Check if user name and hashed password match
        run-query @db_multitenant_SaaS = "select userId from users where email='%s' and hashed_pwd='%s'" output sess_userId : email, hashed_pwd
            query-result sess_userId to rd->sess_userId
            // If match, update user table with session ID
            run-query @db_multitenant_SaaS no-loop = "update users set session='%s' where userId='%s'" : rd->sess_id, rd->sess_userId affected-rows define arows
            if (arows != 1) {
                @Could not create a session. Please try again. <<.login_or_signup();>> <hr/>
                exit-request
            }
            // Set user ID and session ID as cookies. User's browser will return those to us with every request
            set-cookie "sess_userId" = rd->sess_userId
            set-cookie "sess_id" = rd->sess_id
            // Display home, make sure session is correct first and set flags
            _check_session();
            _show_home();
            exit-request
        end-query
        @Email or password are not correct. <<.login_or_signup();>><hr/>

    // Login screen, asks user to enter user name and password
    } else if (!strcmp (action, "")) {
        login_or_signup();
        @Please Login:<hr/>
        @<form action="https://open-source.net.cn/?req=login" method="POST">
        @<input name="action" type="hidden" value="login" size="50" maxlength="50">
        @<input name="email" type="text" value="" size="50" maxlength="50" required autofocus placeholder="Email">
        @<input name="pwd" type="password" value="" size="50" maxlength="50" required placeholder="Password">
        @<button type="submit">Go</button>
        @</form>
    }
}

// Display Login or Sign Up links
void login_or_signup() {
        @<a href="https://open-source.net.cn/?req=login">Login</a> & & <a href="https://open-source.net.cn/?req=login&action=newuser">Sign Up</a><hr/>
}
通用应用程序 (_show_home.vely)
通过本教程,您可以创建任何您想要的多租户 SaaS 应用程序。 上面的多租户处理模块 (login.vely) 调用 _show_home() 函数,该函数可以容纳您的任何代码。 此示例代码显示了 Notes 应用程序,但它可以是任何东西。 _show_home() 函数调用您希望的任何代码,并且是一个通用的多租户应用程序插件
#include "vely.h"

void _show_home() {
    notes();
    exit-request
}
笔记应用程序 (notes.vely)
该应用程序能够添加、列出和删除任何给定的笔记
#include "vely.h"
#include "login.h"
// Notes application in a multitenant Cloud
void notes () {
// get global request data
reqdata *rd;
get-req data to rd
// If session invalid, display Login or Signup
if (!rd->is_logged_in) {
login_or_signup();
}
// Greet the user
@<h1>Welcome to Notes!</h1><hr/>
// If not logged in, exit - this ensures security verification of user's identity
if (!rd->is_logged_in) {
exit-request
}
// Get URL parameter that tells Notes what to do
input-param subreq
// Display actions that Notes can do (add or list notes)
@<a href="https://open-source.net.cn/?req=notes&subreq=add">Add Note</a> <a href="https://open-source.net.cn/?req=notes&subreq=list">List Notes</a><hr/>
// List all notes for this user
if (!strcmp (subreq, "list")) {
// select notes for this user ONLY
run-query @db_multitenant_SaaS = "select dateOf, note, noteId from notes where userId='%s' order by dateOf desc" : rd->sess_userId output dateOf, note, noteId
query-result dateOf to define dateOf
query-result note to define note
query-result noteId to define noteId
// change new lines to <br/> with fast cached Regex
match-regex "\n" in note replace-with "<br/>\n" result define with_breaks status define st cache
if (st == 0) with_breaks = note; // nothing was found/replaced, just use original
// Display a note
@Date: <<p-out dateOf>> (<a href="https://open-source.net.cn/?req=notes&subreq=delete_note_ask¬e_id=%3C%3Cp-out%20noteId%3E%3E">delete note</a>)<br/>
@Note: <<p-out with_breaks>><br/>
@<hr/>
end-query
}
// Ask to delete a note
else if (!strcmp (subreq, "delete_note_ask")) {
input-param note_id
@Are you sure you want to delete a note? Use Back button to go back, or <a href="https://open-source.net.cn/?req=notes&subreq=delete_note¬e_id=%3C%3Cp-out%20note_id%3E%3E">delete note now</a>.
}
// Delete a note
else if (!strcmp (subreq, "delete_note")) {
input-param note_id
// Delete note
run-query @db_multitenant_SaaS = "delete from notes where noteId='%s' and userId='%s'" : note_id, rd->sess_userId affected-rows define arows no-loop error define errnote
// Inform user of status
if (arows == 1) {
@Note deleted
} else {
@Could not delete note (<<p-out errnote>>)
}
}
// Add a note
else if (!strcmp (subreq, "add_note")) {
// Get URL POST data from note form
input-param note
// Insert note under this user's ID
run-query @db_multitenant_SaaS = "insert into notes (dateOf, userId, note) values (now(), '%s', '%s')" : rd->sess_userId, note affected-rows define arows no-loop error define errnote
// Inform user of status
if (arows == 1) {
@Note added
} else {
@Could not add note (<<p-out errnote>>)
}
}
// Display an HTML form to collect a note, and send it back here (with subreq="add_note" URL param)
else if (!strcmp (subreq, "add")) {
@Add New Note
@<form action="https://open-source.net.cn/?req=notes" method="POST">
@<input name="subreq" type="hidden" value="add_note">
@<textarea name="note" rows="5" cols="50" required autofocus placeholder="Enter Note"></textarea>
@<button type="submit">Create</button>
@</form>
}
}具有 C 性能的 SaaS
Vely 使您能够在 Web 应用程序中利用 C 语言的强大功能。 多租户 SaaS 应用程序是受益于此的用例的主要示例。 看一下代码示例,编写一些代码,然后试用 Vely。


评论已关闭。